 App guide
App guide
App guide
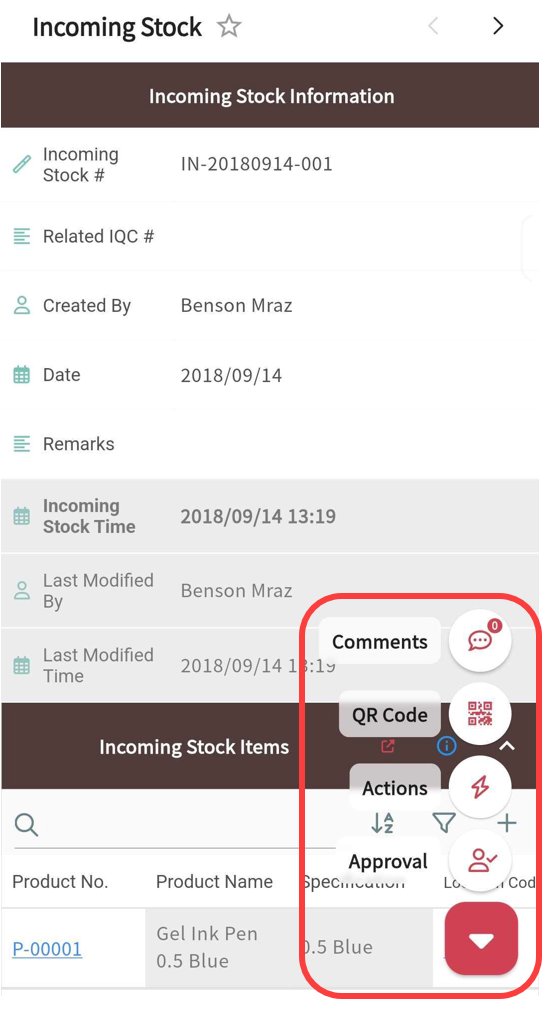
At the top right of the Form Page, you will find two buttons: Add New Entry and the Form Page Options Menu. At the bottom right, the triangle icon opens the Tools Menu, which includes:
・QR code: Used to share this sheet (via QR code or URL)
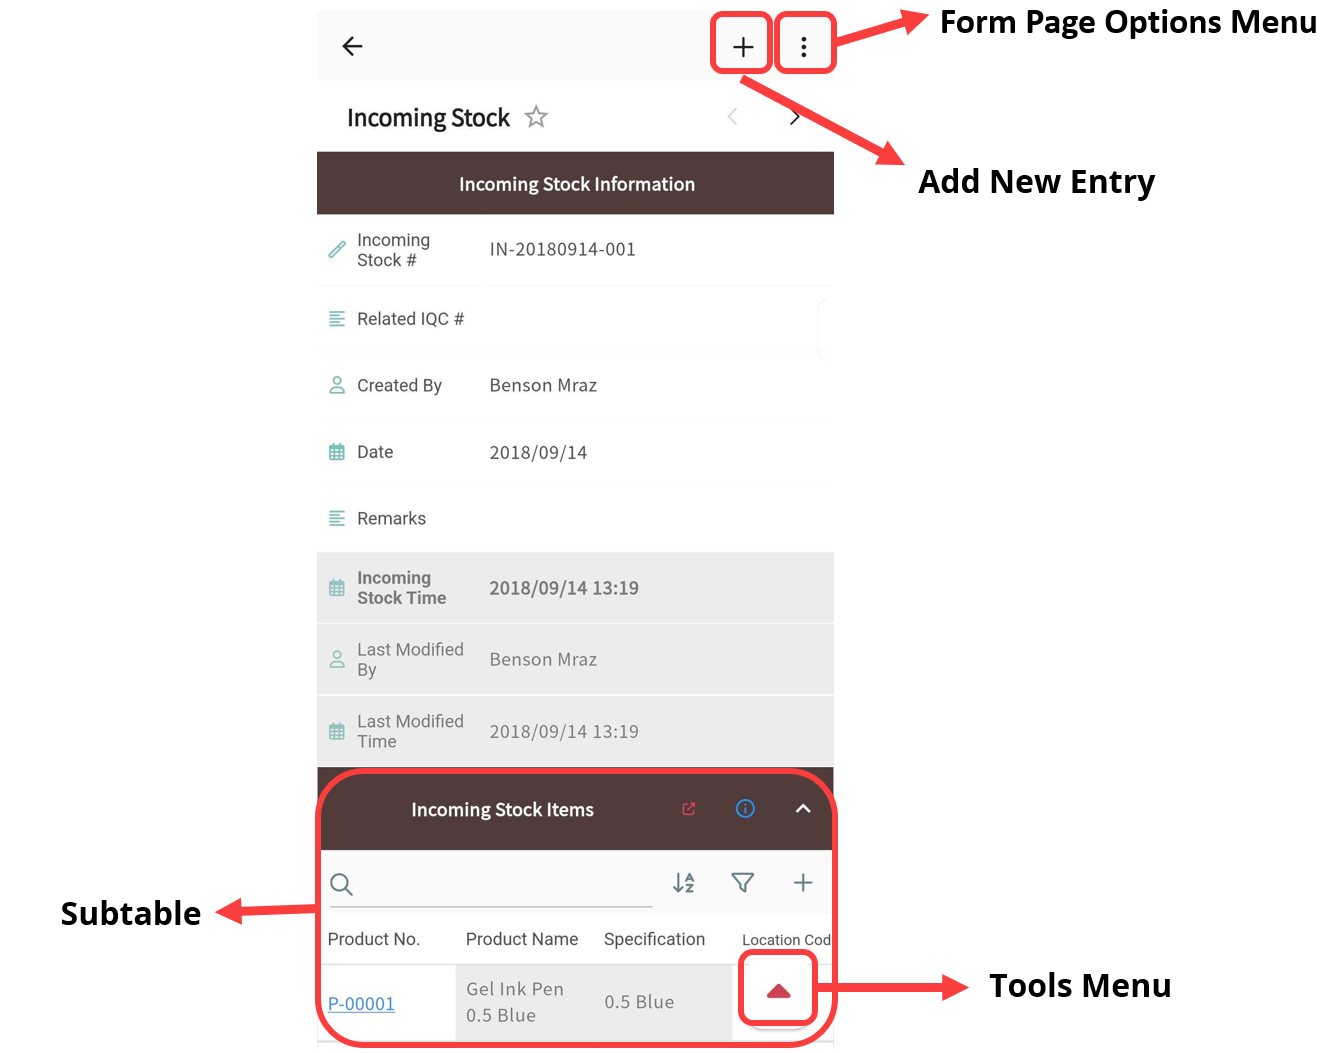
If the form includes Subtables, they will always appear at the bottom of the Form Page.
・Add Entry: Entries can be added either from the Listing Page or directly within the Form Page by tapping the "+" icon.
・Edit Entry: Tap on a field to edit its content. You can upload pictures or files from your mobile device. If you want to access photos stored on your device, please make sure Ragic App has been granted photo access in your phone’s settings.
・Delete Entry: To delete an entry, go to the Form Page, tap the options menu in the top-right corner, then select Delete Entry.
There are three ways to edit Subtable data:
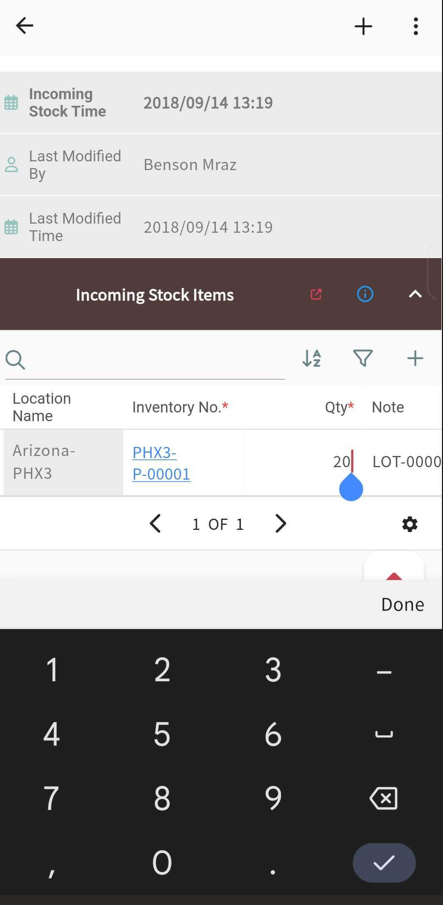
1. Directly edit within the Subtable by clicking on a field and entering a value.
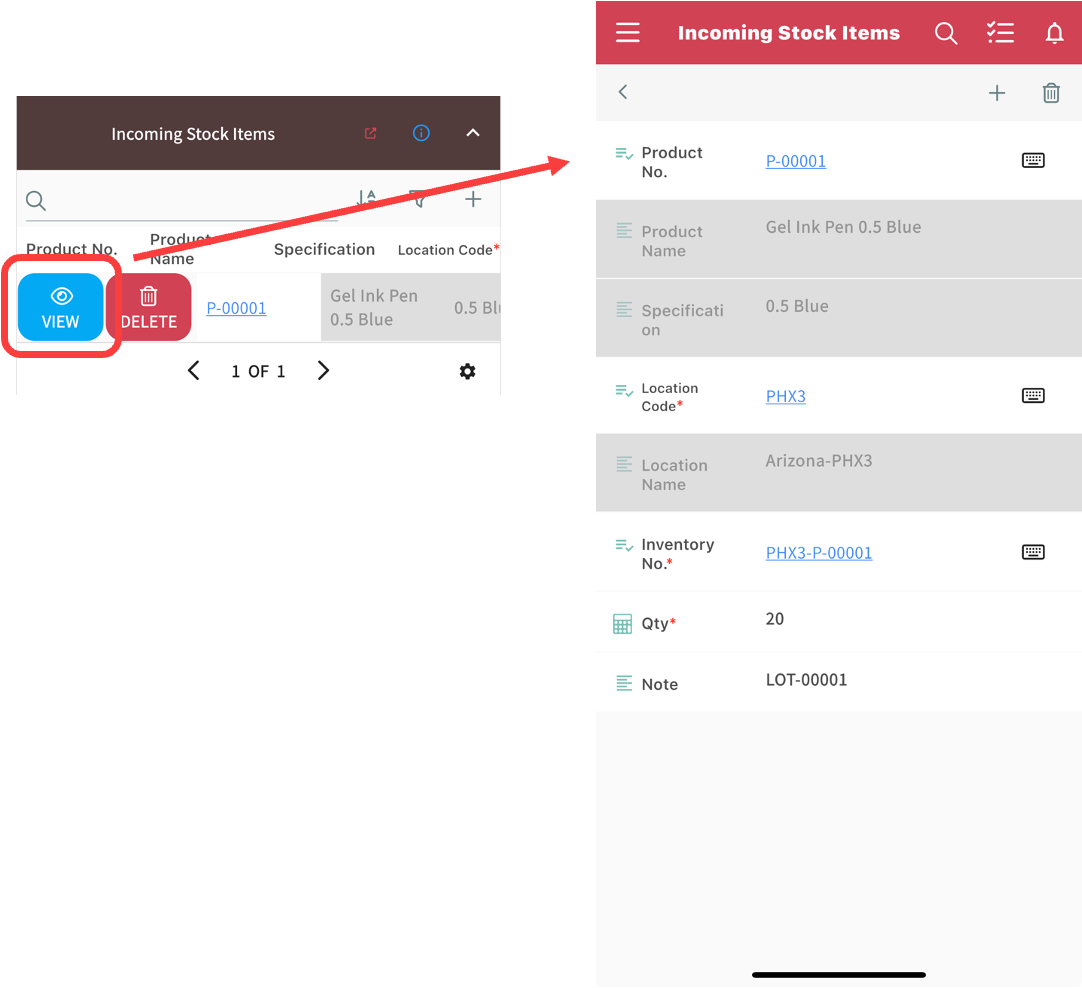
2. Swipe a row to the right to reveal the "View" and "Delete" icons. Tap the "View" icon to open the detail page of that Subtable row, where you can edit the Subtable data.
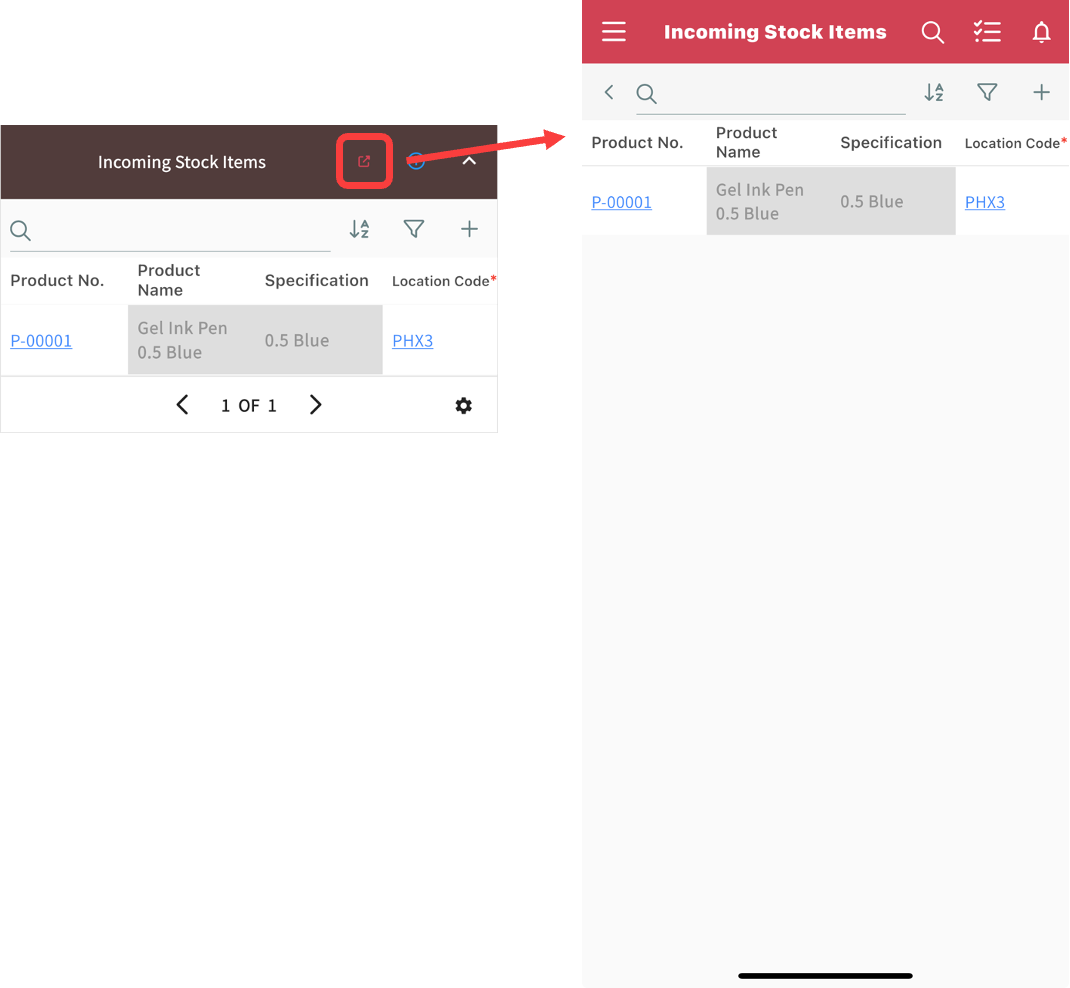
3. To enhance usability, Subtables support direct add/edit/delete actions on the Form Page. You can also tap the red “Enter” icon in the top-right corner of a Subtable to switch to a dedicated Subtable view, which shows only Subtable data for a more focused experience and is well suited for editing when the Subtable contains many rows.
Independent Fields: Tap the field, and a "Scan Barcode" icon will appear on the right. Tap the icon to scan a barcode and input data into the field.
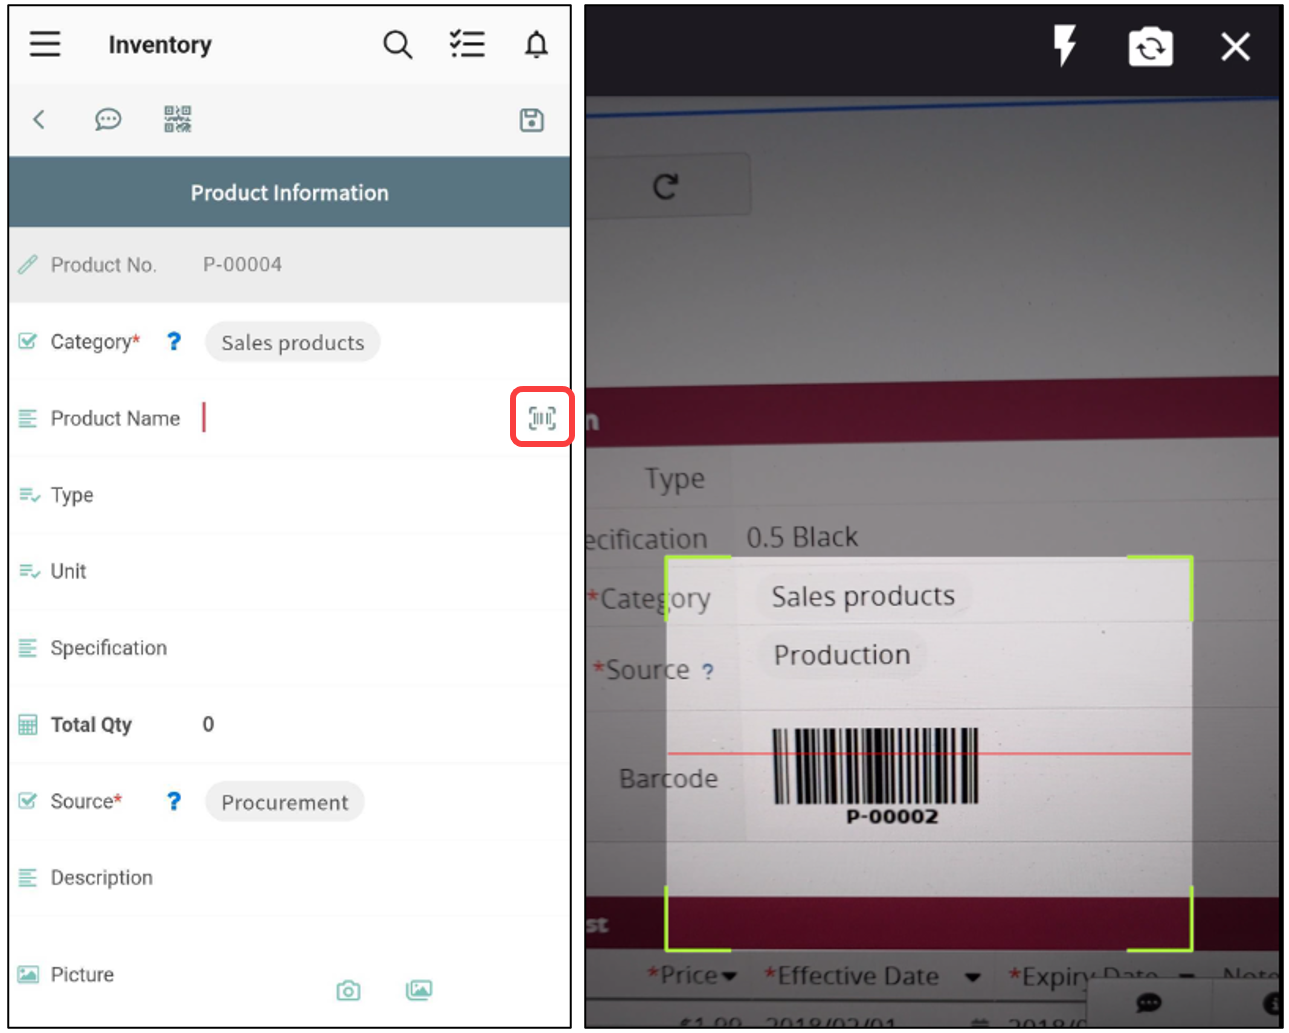
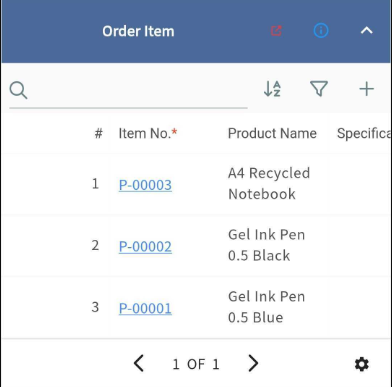
Subtable Fields: Swipe the Subtable row to the right and tap the "View" icon to enter the detailed record page. Then, tap the field, and the "Scan Barcode" icon will appear, allowing you to scan a barcode to enter data into the Subtable.

Additionally, if the Subtable's Linked Field has Multiple subtable rows at once enabled, you can scan multiple barcodes consecutively to quickly add several Subtable rows.
Note: The barcode scanned here is used to enter field values. Scanning Action Barcodes is not supported.
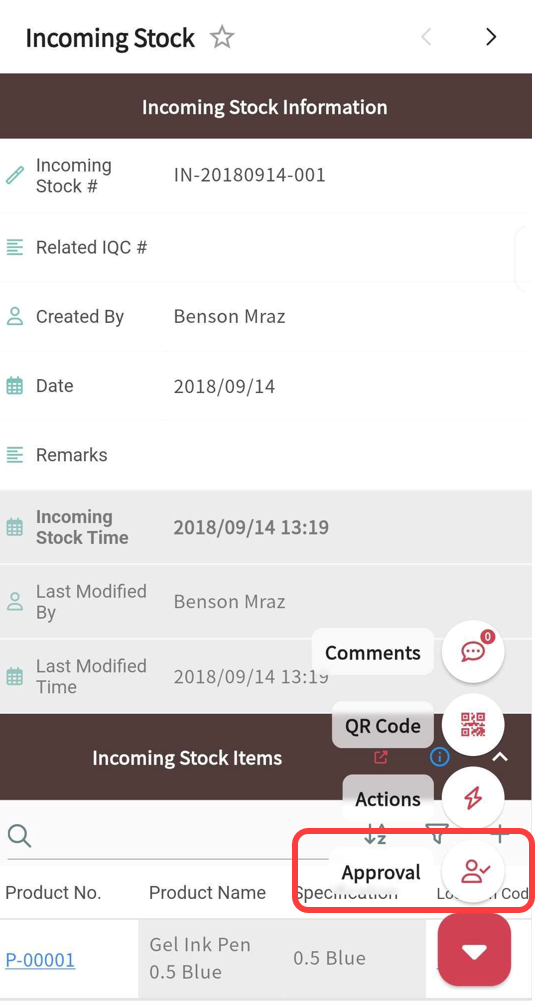
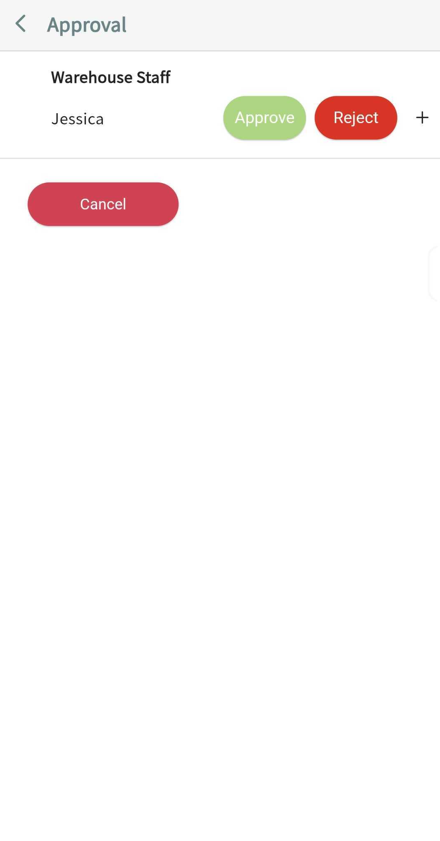
You can click the triangle icon at the bottom right of the Form Page and select Approval to enter the approval page for that record.
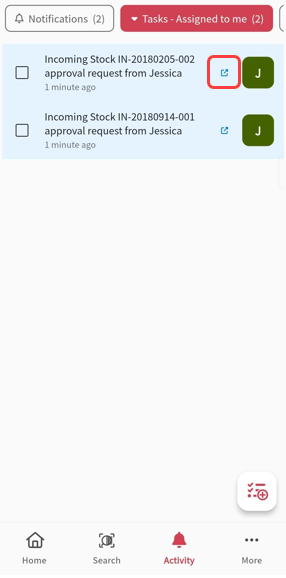
You can also go to Activity → Tasks in the Main Function Bar to view all pending approval items. Tapping the icon on each item will take you to the corresponding approval page.
From there, you can complete the approval .
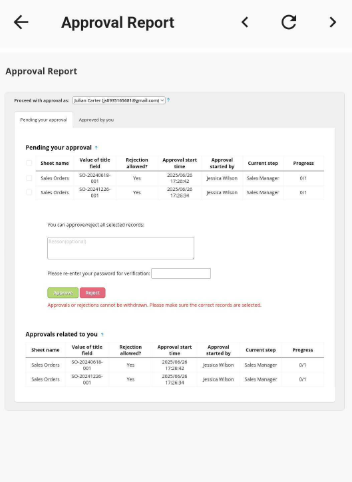
Additionally, you can access the Approval Report under the Reports tab to view all approval records related to themselves or their deputies. If the Approval Report is unavailable, please contact your SYSAdmin.
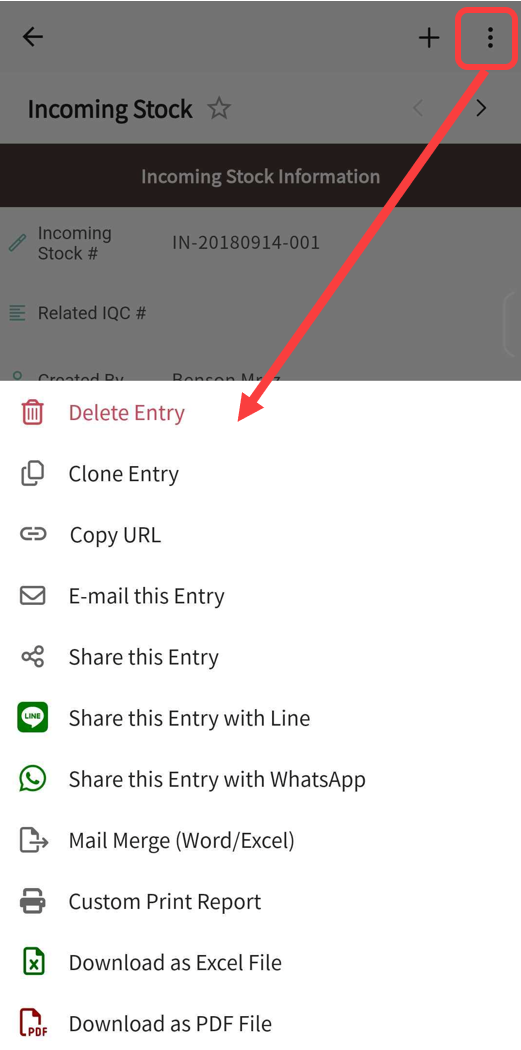
Tap the options menu on the top right of the Form Page to access the following actions:
・Delete Entry
・Clone Entry
・Copy URL: Directly copies the URL of the entry.
・E-mail this Entry: Advanced settings, such as applying the current Subtable filter or saving the email as a template, are not supported.
・Share this Entry with WhatsApp
・Mail Merge (Word/Excel): Requires prior configuration in the web version before it can be used in the app.
・Download as Excel File
・Download as PDF File
These functions work the same way as in the web version. Please refer to the related documentation for more details.
 Thank you for your valuable feedback!