Ragic’s Reservation System is, in essence, a report generated from a particular sheet: When someone reserves a time slot using the report, the system will automatically generate a corresponding entry of reservation record using the information entered. So, it’s possible to expand the capability of the reservation system by altering the design of the source sheet. Some examples are shown below.
If you want the system to automatically send a reservation confirmation E-mail, you can set up an Action Button to send a custom email in the source sheet and configure the button to "Automatically run when saving", as shown in the figure below.
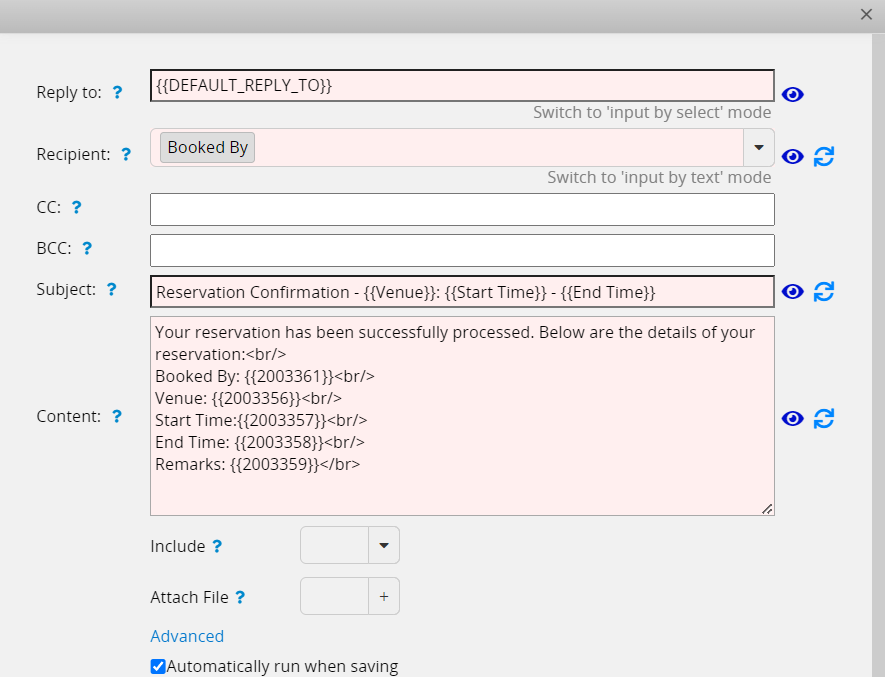
Once someone reserves a timeslot, the system will automatically create an entry in the source sheet, which in turn would trigger the action button set up to "Automatically run when saving". So once a booking is made, the button executes and sends an E-mail to the address specified by the "Booked By" field (which needs to be set up with the Field Type Email or Select User).
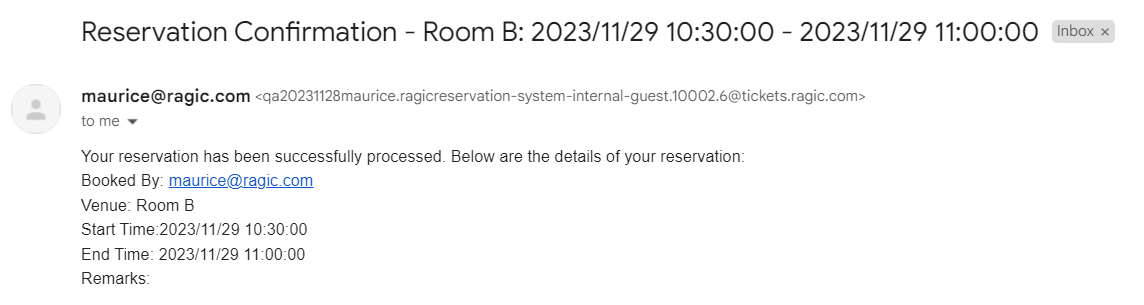
An example of such a reservation confirmation email is shown below.
If you want the system to automatically send an E-mail reminder to the "Booked By" address or user ahead of an upcoming reservation, you can set up Reminders, as shown below.
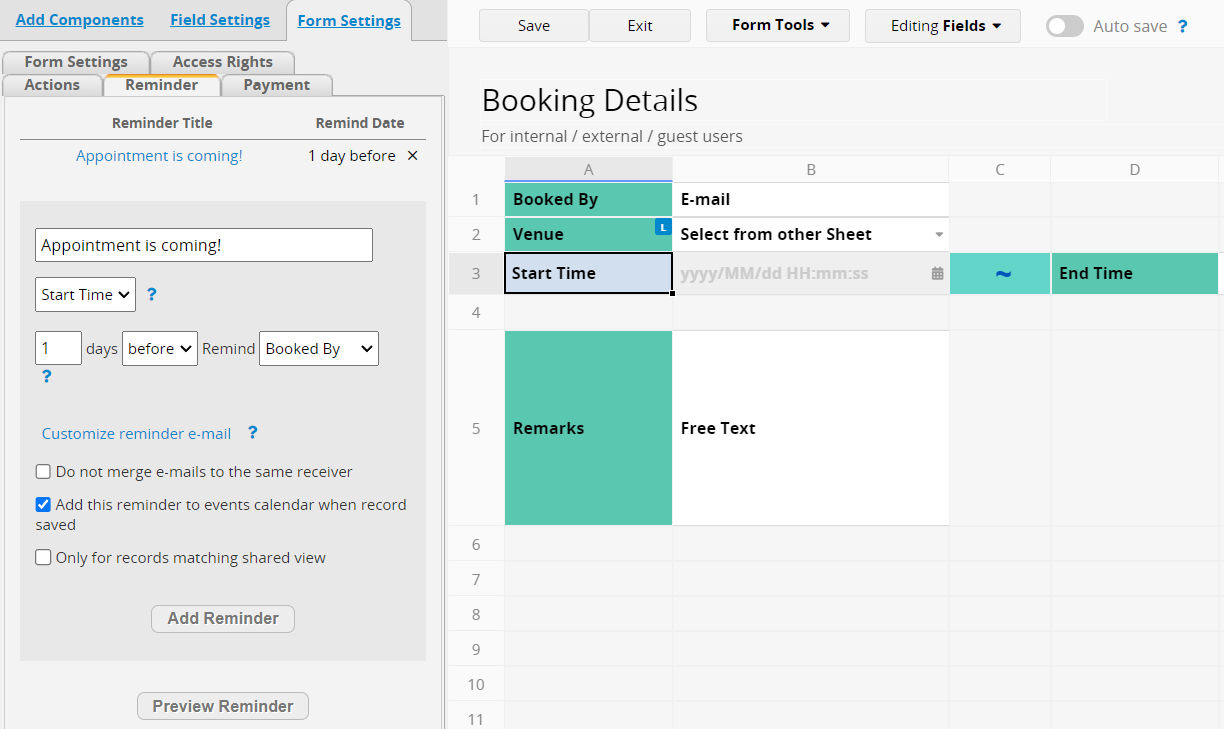
For the Date field, you can choose "Start Time" or "End Time" (Ragic currently does not support a single reservation across different dates, so start and end times normally are on the same day). Then, you can choose to send the reminder on the day of or any number of days before the actual reservation.
Note here that the "Booked By" field must be set up with the Field Type Select User or Email to successfully send a reminder. If the recipient of the reminder is not the "Booked By" E-mail address or user, you can also set up a separate reminder recipient field in the sheet.
In addition, you can also configure the system to send a reminder through the Ragic app or website push notification if the recipient allows. (See Notifications for details).
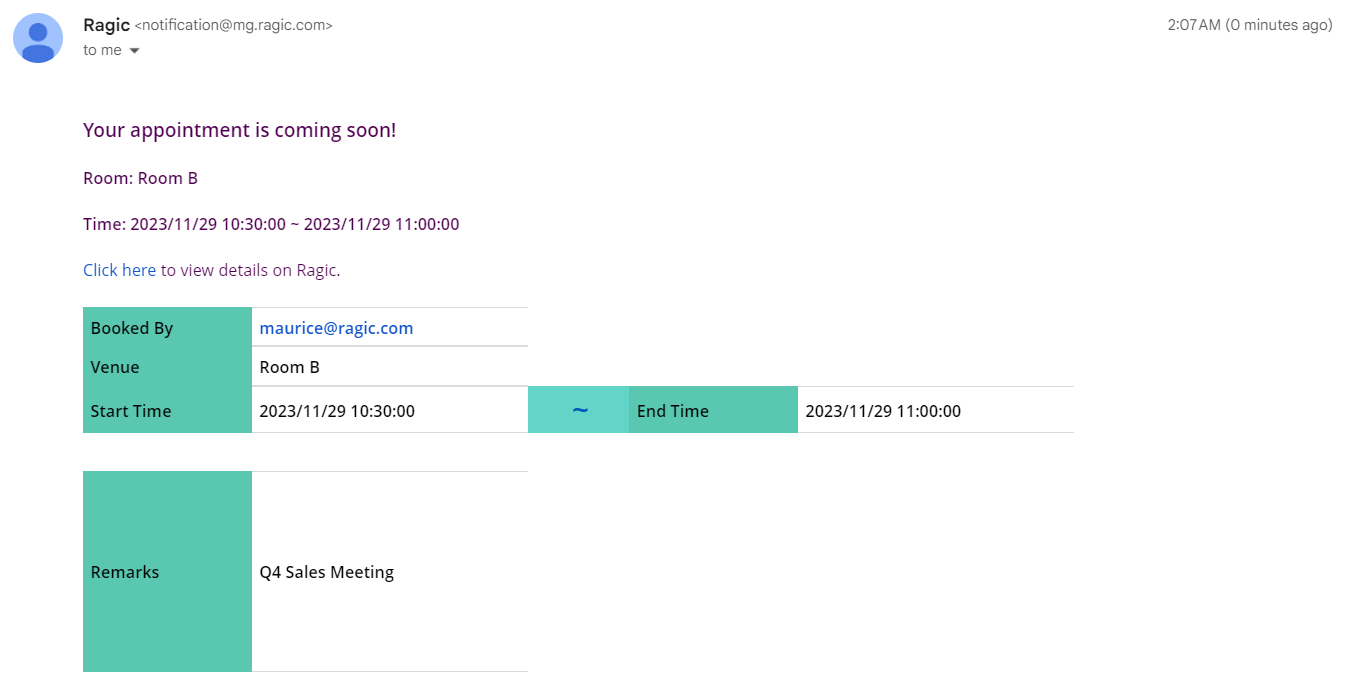
An example of the reminder E-mail is shown below. (The content of the reminder can be customized)
Reservations are sometimes best viewed in a calendar. If that’s the case for you, just use the report function in the source sheet to generate a Calendar Report, as shown below.
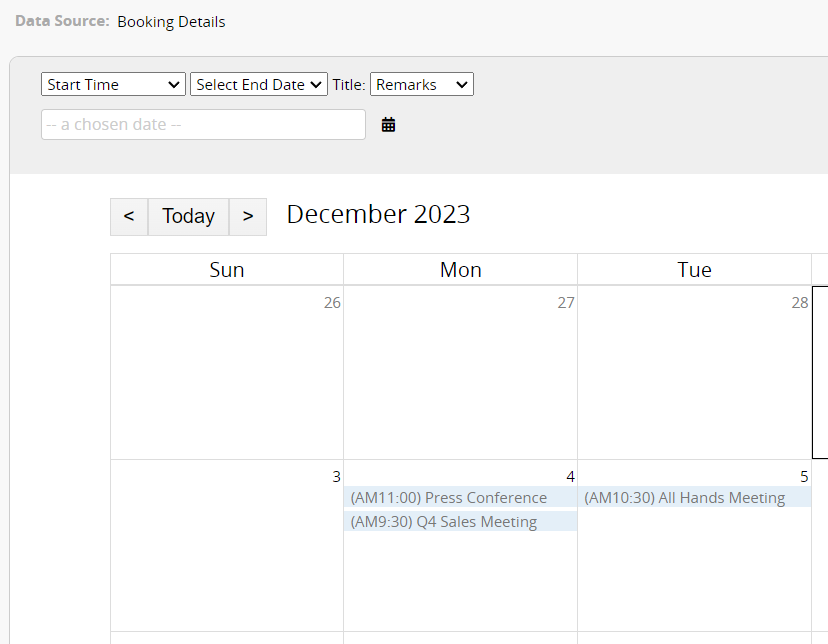
You can click on the short description of individual events on the calendar report to see the details. If you want the short description to display more than the booking remark and include, for example, "Booked By" plus "Meeting Room", then you can create a dedicated field for the calendar text in the sheet and use a string formula to create the value you want.
If you want the reservation to be viewable in an external calendar (e.g. Google Calendar or Outlook), you can use the Calendar Sync function. Take note though that the date format supported by external calendars generally separates date (yyyy/MM/dd) and time (HH:mm), which is different from the combined date + time (yyyy/MM/dd HH:mm) format that the reservation system and calendar report supports. The solution is to create additional fields used for syncing external calendars with string formula and the string-to-date (DATEVALUE) formula to extract and separate the date (yyyy/MM/dd) and time (HH:mm) values.
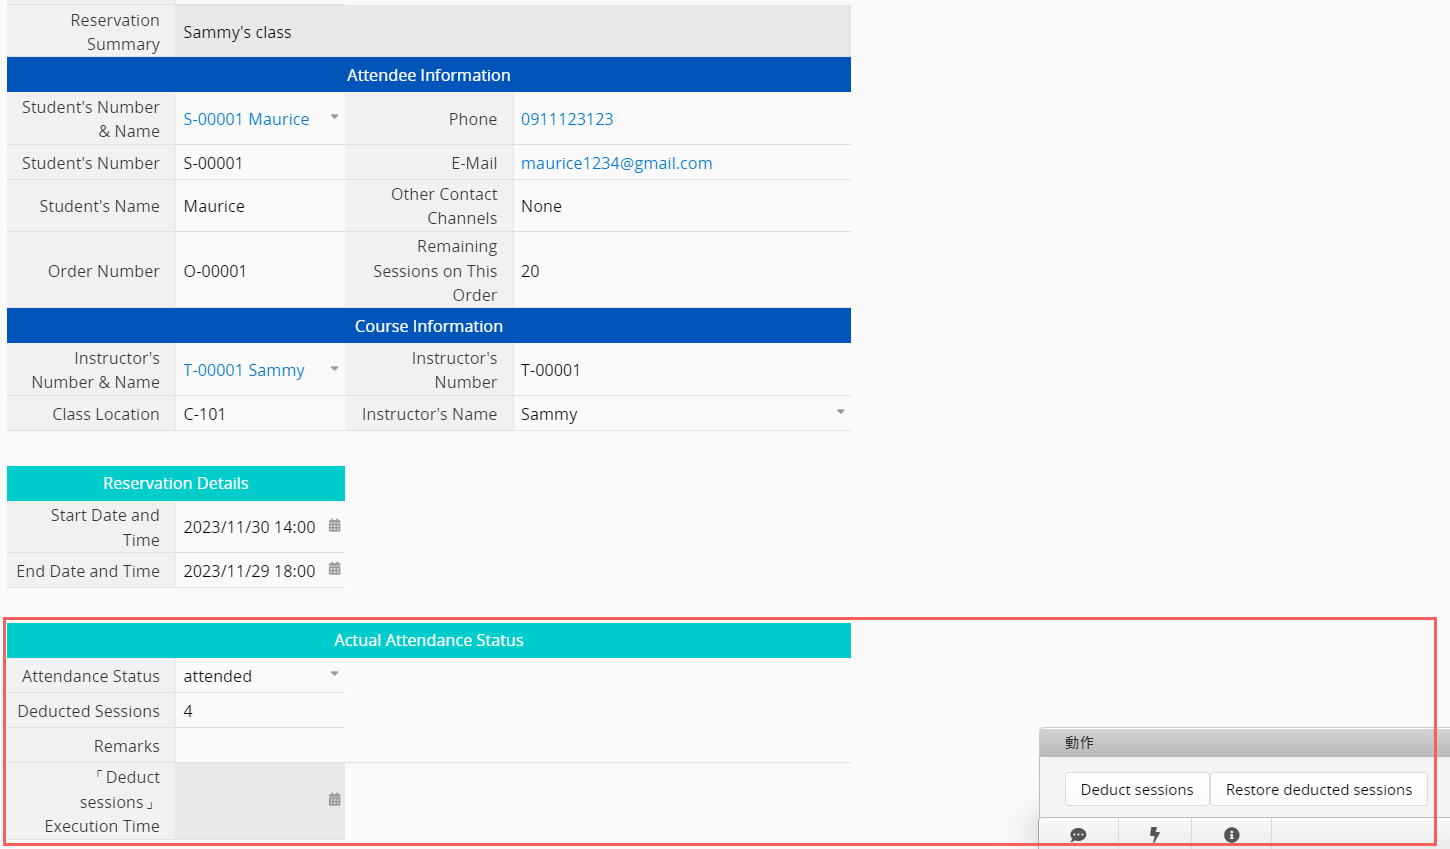
When it comes to booking management, it’s not just about managing schedules and availability, it’s also about tracking whether the reservation is actually fulfilled (i.e. the person shows up / participates in the event / uses equipment). When using Ragic’s reservation system, all reservation records will be stored automatically in the source sheet. Simply add a status field in the sheet to track the status of all reservations. You can even link it with other sheets to implement functions such as tracking remaining sessions and calculating fees.
Take, for example, class reservation for a one-on-one class on a point system where a point is deducted for every class attended. By adding one single element, both attendance management and points management can be implemented in one go: On the class reservation sheet, an "Attendance" field can be added and an Action Button configured to Update Value on Another Sheet, subtracting a point from the original points order when executed.
You can set things up so that when someone makes a reservation, their details are automatically saved to your CRM. That way, you won’t have to re-enter any data later. Everything will already be in place for follow-up or record-keeping.
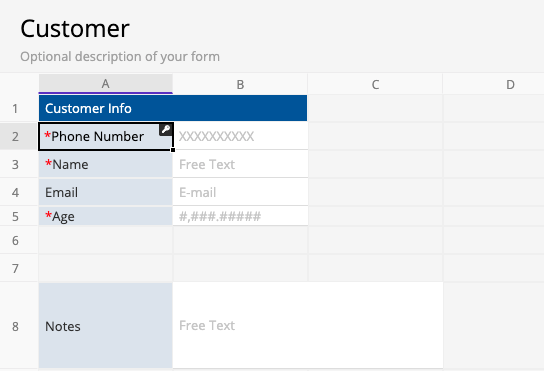
To start, make sure your "Reservation" sheet includes an Identification Field, something unique like a phone number or email address. In this example, we’ll use phone number.
Next, create a "Customer" sheet like the one shown below, and make sure it includes the same identification field used in the "Reservation" sheet. (If you already have this sheet, just double-check that the correct identification field is set up.)
And after, add a Convert Records button to your "Reservation" sheet to quickly create a new entry in the "Customer" sheet for each person who makes a reservation.
To pull up existing customer info when someone books again, add a new field to your "Reservation" sheet that links to the identification field in your "Customer" sheet.
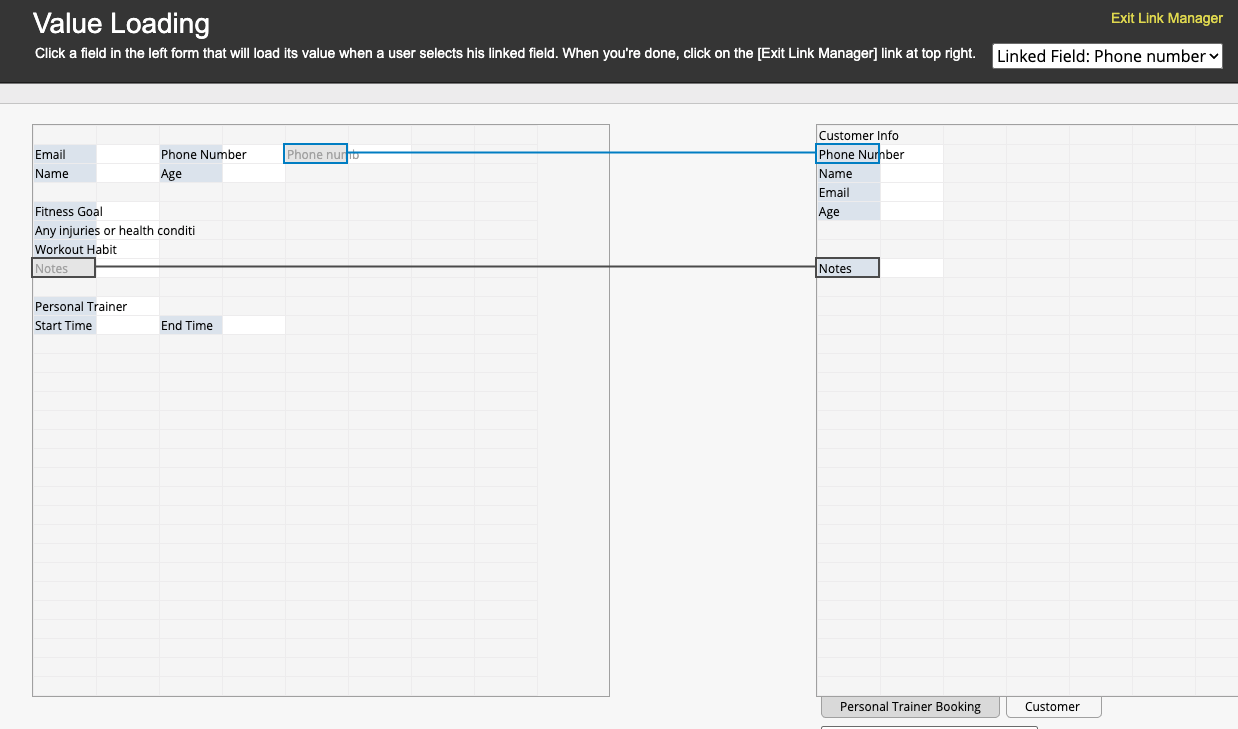
Next, use a formula in that new field to reference the original identification value, like the phone number. You can Hide this field or make it Read Only so no one accidentally changes it.

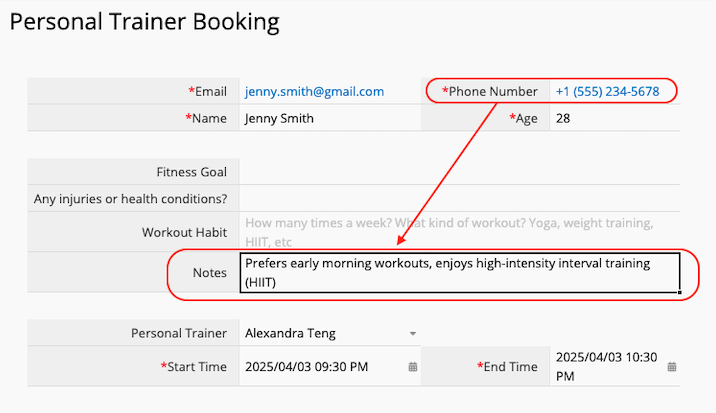
Once this is set up, whenever a returning customer makes a reservation, their details will show up right away. You’ll be able to see any notes or special info directly in the "Reservation" sheet, which helps you deliver a more personalized experience.
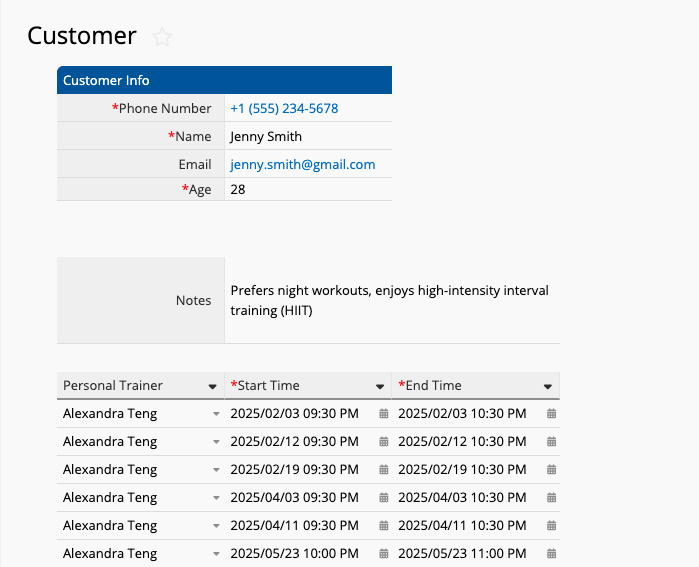
You can also see a customer's full reservation history by setting up a Show References From Existing Sheets Subtable in your "Customer" sheet. This adds a Subtable showing all their linked reservations at a glance.
You can create entries for different services or packages and easily link them to your "Reservation" sheet
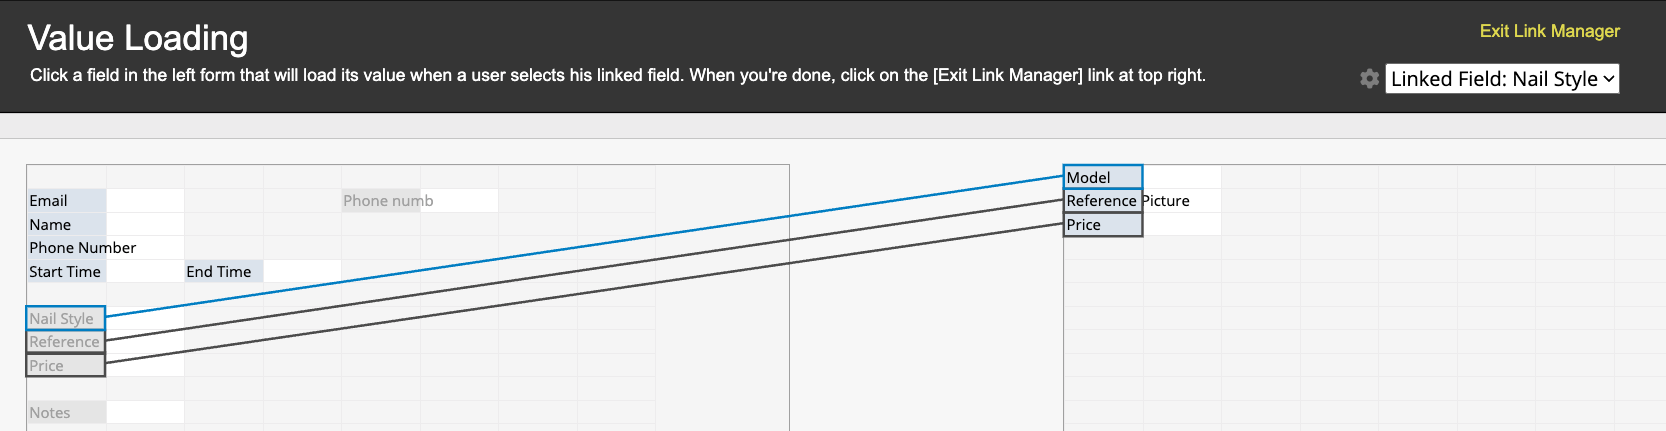
Just add a Linked Field in your "Reservation" sheet that pulls data from your "Service" sheet. Then, include any relevant details you want to display, like pricing or descriptions, as the Loaded Fields.
With this setup, when someone fills out the form, they can select a service, and all the related details will automatically appear.
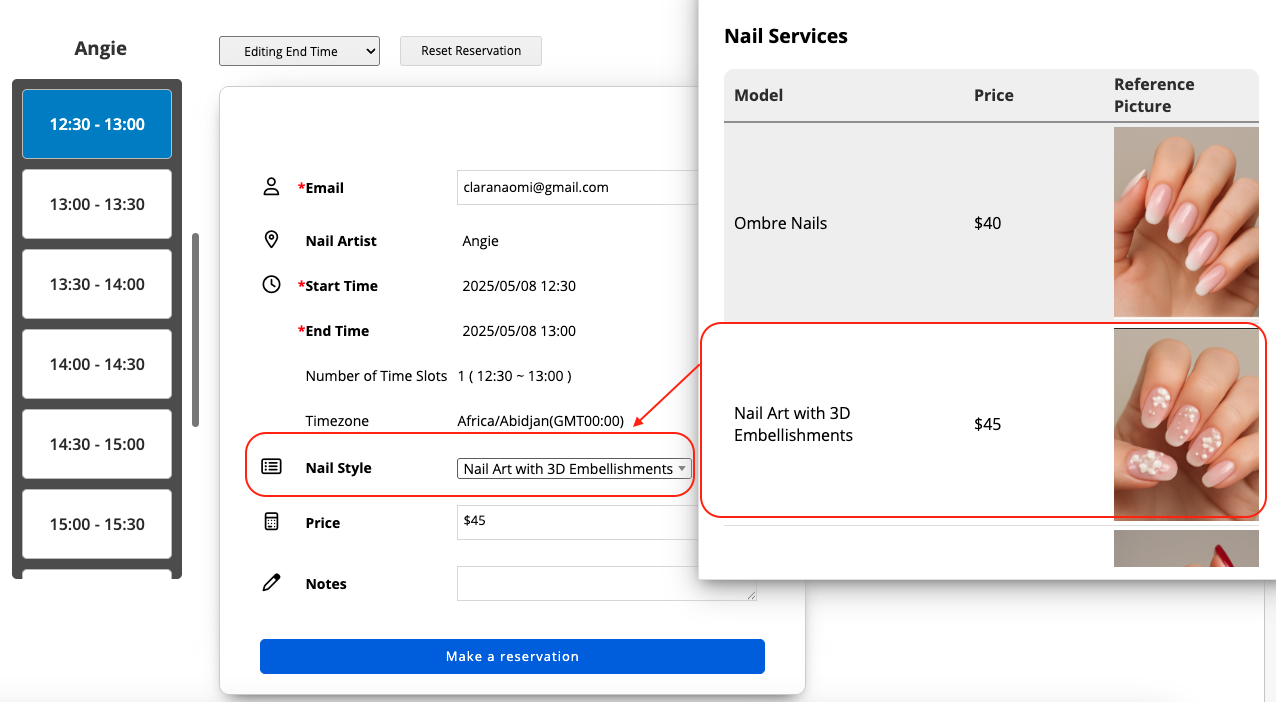
Note: This feature works when both the Linked Field and the fields you want to display are custom fields. It currently doesn't support Link and Load when the Linked Field is a reservation "Item".
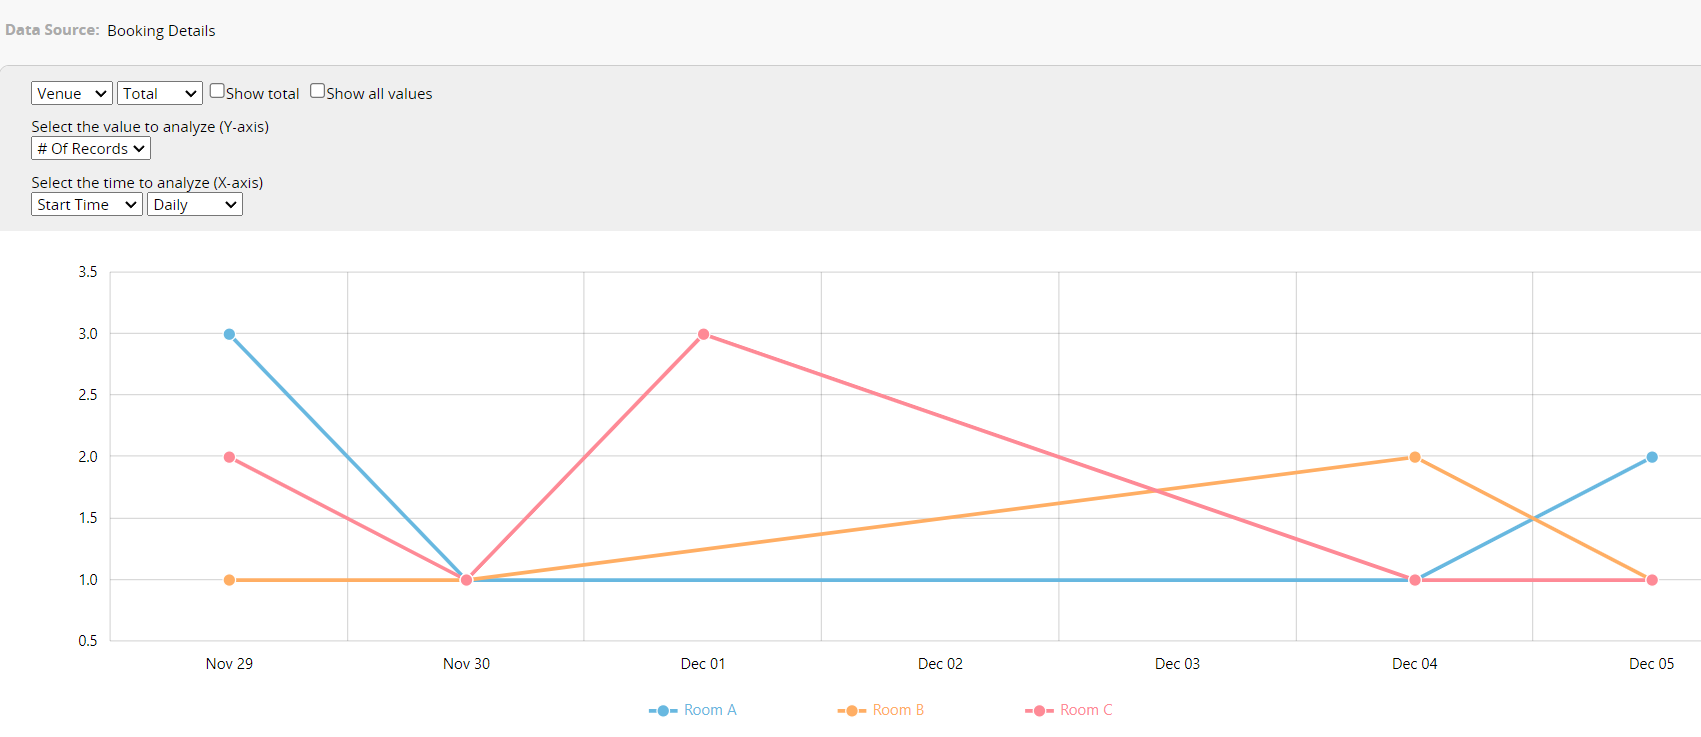
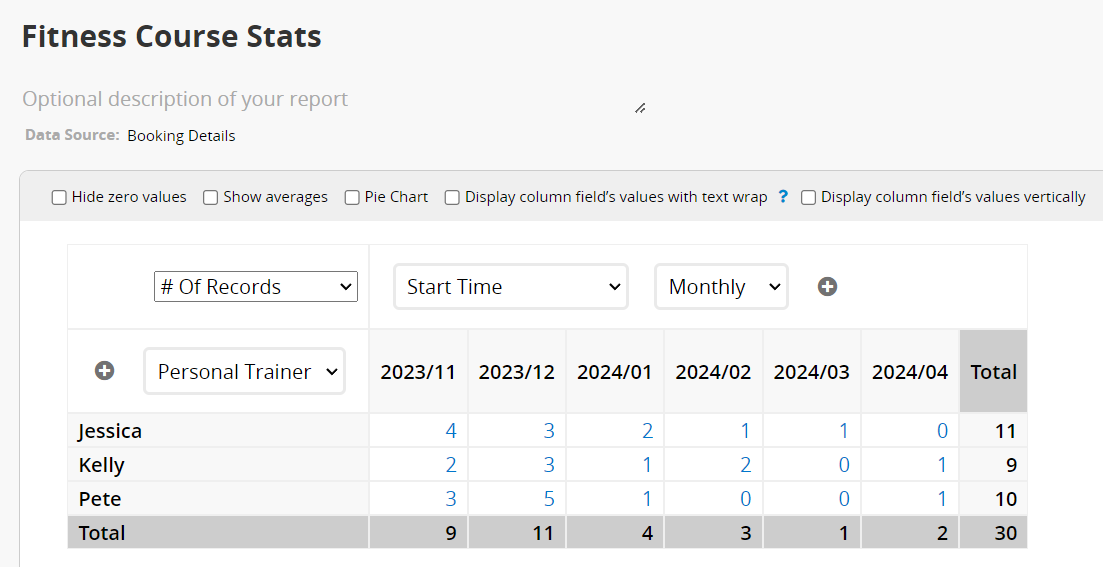
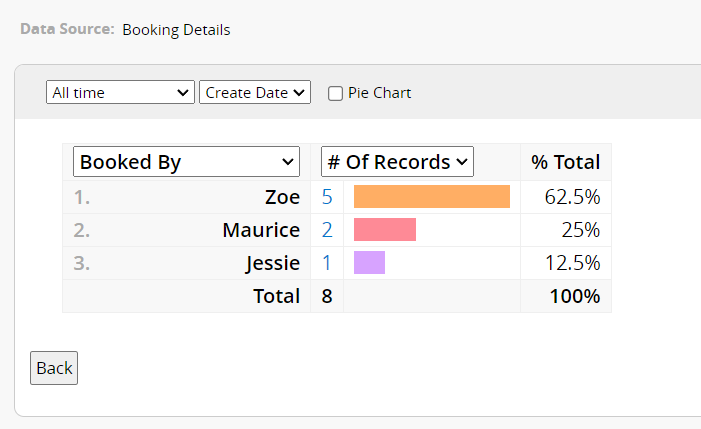
You can also use Ragic’s other report functions to generate various figures for data analysis from the reservation system source sheet.
For example, you can use a Line Graph to analyze meeting room usage statistics:
Or Pivot Table to analyze the booking data for different instructors:
Or Ranking Report to see who had the most reservations.
 Thank you for your valuable feedback!
