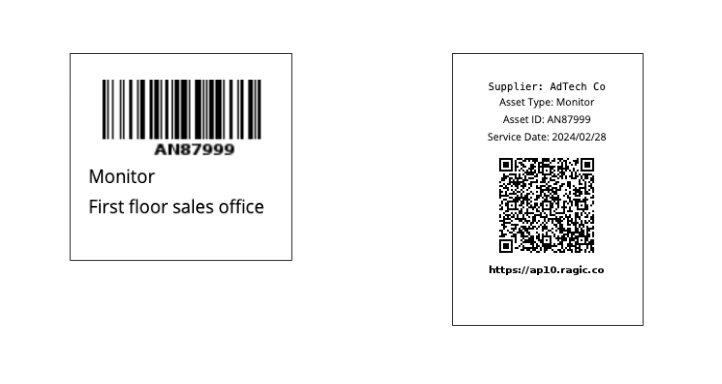
How to create labels like above in Ragic to streamline your asset management?
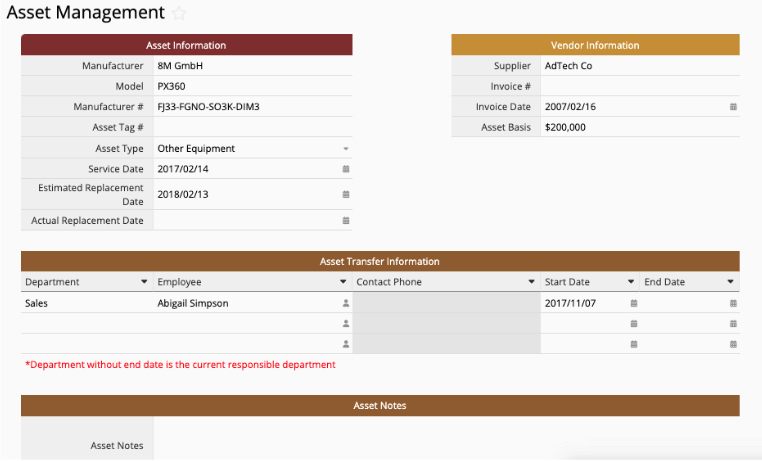
If you've already created an "Asset Management Sheet" in Ragic, you can skip this step. If you haven't, you can consider installing our "Asset Management Sheet" by going to Install Templates and installing the related template under the "Administration" section.
Depending on the nature of the assets you're managing, for assets that don't undergo frequent borrowing or transfer, the "Asset Management Sheet" will be more suitable.
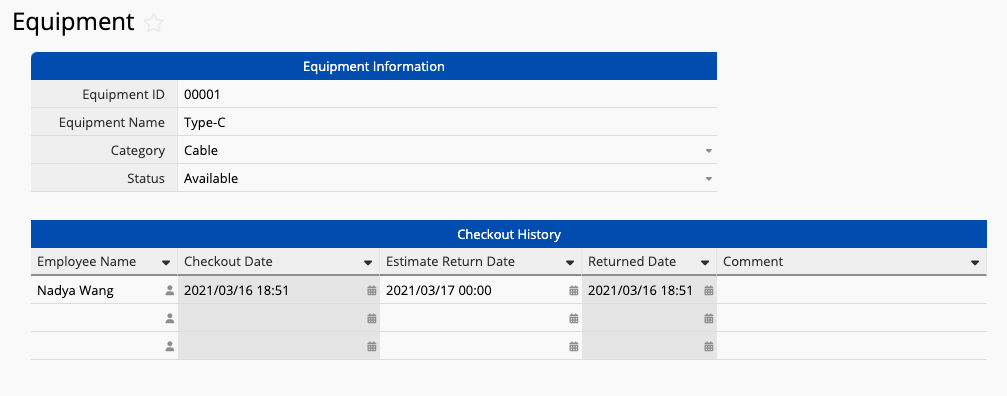
Alternatively, if your assets require regular borrowing and transfer, consider downloading either the "Equipment Sheet" from the "Equipment Management" section or the "Equipment Maintenance and Repair Sheet".
You can always modify the template sheet accordingly, or you can also build your own sheet.
You have 2 types of barcode to choose from:

This method typically uses a 1D barcode such as Code 128. You will first need to navigate to the corresponding sheet in Ragic. In the search bar, you can scan the barcode instead of manually entering the Equipment ID to find the matching record.
When to use this method: If you need to input an ID in another sheet, for example, the "Equipment ID" in the "Equipment Checkout Sheet", then a 1D barcode is more suitable.
How to set it up:
Option A: Create a Barcode field and apply a formula that references the "Equipment ID" field. (This results in two fields: the original "Equipment ID" field and a corresponding "barcode" field.)
Option B: In the Field Settings of the "Equipment ID" field, simply enable Barcode. (Only one "barcode" field will be shown.)
You can also convert the asset record’s URL directly into a QR Code. You can simply scan the QR Code using your phone’s camera or the Ragic App to open the corresponding record.
When to use this method: If your main need is to "scan a code to view the complete information" of an asset, consider using a QR Code.
How to set it up:
Set the field to Auto Generated Values, select "Record URL" as the format, and enable Barcode in the Field Settings.
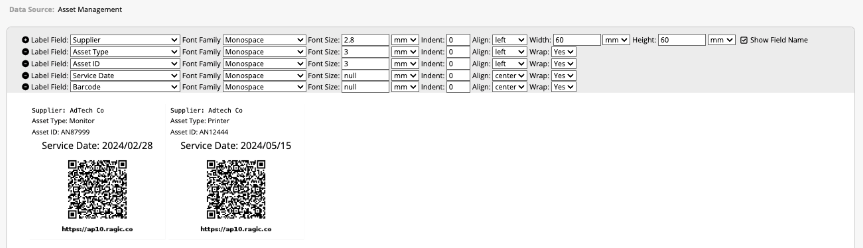
In the upper right corner of the sheet you have created, click Reports and choose Label Maker. Then, choose the fields containing the information you want to include in the label. You can adjust the font size, label size, and format the label as desired. Once you finish formatting, you can print the label.
 Thank you for your valuable feedback!
